IPodWireManager
iPod Nano 3G Wire Manager
(This page will be referenced on my personal page and on the 3D-projects page.)
Basic Idea
I use an iPod Nano 3G to listen to music on the go. I have been wrapping my long ear-bud cord around the device. When I use it, I usually only need to unwrap part of it, but the part that is still wound around the device impedes the use of the controls. So I'd like a solution that allows the cord to be completely wrapped, or partly unwrapped, or completely unwrapped, without impeding the use of the device. And I'd like whatever is used to manage the wire to be attached to the iPod, so that I don't have two loose "hinges" of wire -- one between the iPod and the wire manager, the other between the wire manager and the ear buds.
My first iPod was a shuffle, and there was a commercial device sold that did this, called a Shufflemate -- since rebranded as the BruddyClip. However, the design is quite different from the one I use for the iPod Nano wire manager.
Chronology
First Prototype
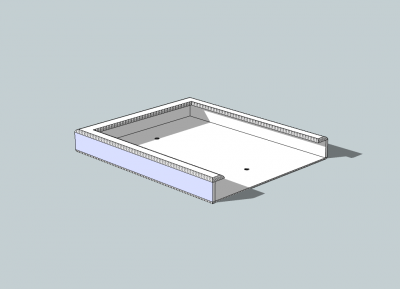
In December, 2011, I decided to start the design. I decided to use Sketchup, since I had some familiarity with it. I should mention that my wife is a jewelry designer and uses Rhino graphics, but I'll save that for another day. After preliminary discussions with Dave Reeves and Joe Sadusk, I decided to make it in two parts: one part would be a sort of "sled" that holds the iPod and the other part would be a spool that attaches to the sled. During the third week in December, Dave printed up a version in PLA on his Prusa Mendel, and it fit the iPod really well. Here is the design:
There were two problems with the prototype. First, The vertical edges in the diagram were too sharp and needed to be rounded as the horizontal edges are. Second, it was clear that the holes, which are supposed to engage the second piece, are too small in diameter and also we probably need four of them, not just two, for stability.
Second Prototype
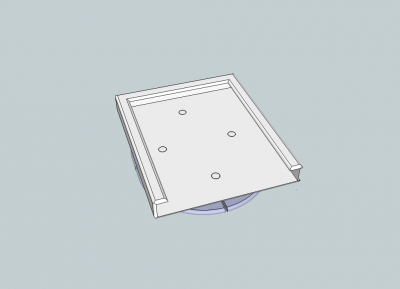
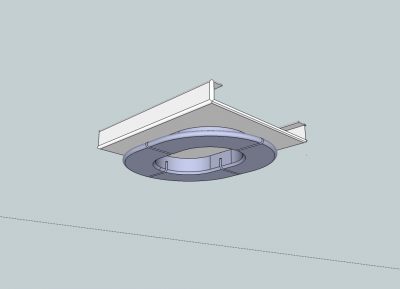
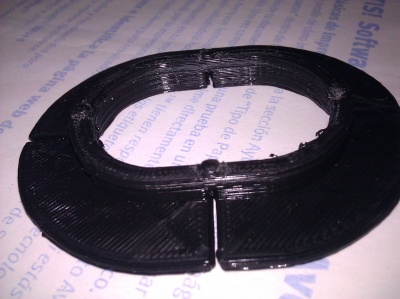
I corrected the above two problems and also designed a spool to engage the holes in the new iPod sled. Two pictures of the assembly, from two different perspectives, are shown here:
The notches are to hold the partly unwound wire in place.
As of this writing (Dec. 28, 2011), I am looking forward to printed copies to see how they work.
Second Prototype, Continued
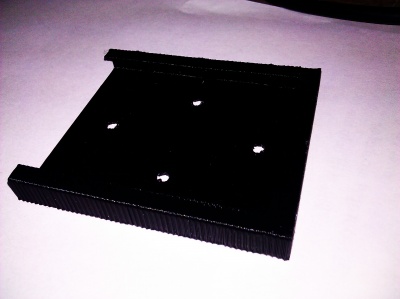
Here we are on January 5, 2012. At first, we could not print the Second Prototype. The .stl that Dave created from Sketchup (using skp2stl) produced G-code with artifacts that printed garbage. After a bunch of efforts (interesting in their own right -- see below) we were able to fix an .stl (not the original one, by the way) by sending it to cloud.netfabb.com, which has a service to, well, fix .stls. This one created good G-code and everything printed really well.
Now, how did it work on the iPod? Unfortunately, just as we were getting ready to try it, I lost the iPod. So this part of the story is to be continued. However, it looks great and the two pieces mate nicely. We'll have to solder them together (PLA), or maybe put a drop of acetone in the wells that hold the pins (ABS).
So now you know the beginning and end of the story so far. But what I'll do now is tell you about the nifty and gory stuff that happened along the way..
After Dave emailed me to say the G-code was bad, I decided to experiment with creating .stl and G-code myself. I really didn't know anything about it, so let me just describe my efforts, chronologically, in a bullet list.
- skp2stl didn't work for me with Sketchup 8 -- but I found something called skp-to-stl that did.
- Pleasant3D is a very nice freeware app for viewing stl and G-code on the Mac, but it doesn't create G-code from stl.
- Still, it was plain, from Pleasant3D, that the stl looked good, but the G-code, when visualized, had crazy artifacts sticking out from it.
- Part of the learning process: I learned that stl is a stereolithography (STL) exchange format. G-code drives the tool, and there are many ways of creating G-code, depending on the tool you are driving. Not only different 3D printers, but other devices, like mills, can be driven with G-code.
- I then decided to try to create my own G-code, and one app that does it is called ReplicatorG. Dave uses Printrun. Both run skeinforge under the hood, Dave's via a mod called SFACT. But I went with ReplicatorG.
- ReplicatorG also produced G-code artifacts. :-(
- I downloaded something called meshlab which can be used to repair .stls. I was not successful, and on my Mac, about half the things I tried crashed the program.
- I then decided to use pure skeinforge. Unlike the ReplicatorG wrapper, native skeinforge allows you to view the design layer by layer.
- I could get rid of some of the artifacts (I forget how), and some things that visually I thought were artifacts were not. The G-code viewers show the path of the tool when they move across layers without extruding anything. I had thought these were extruded artifacts. But even so, looking at the layers, it was clear that something was wrong.
- Since my wife uses Rhino graphics for jewelry design, I decided to try its ability to read in Sketchup files and write out .stl. I thought maybe it would do a better .stl conversion. But in fact, it couldn't even read the .skp. I saw a log msg that seemed to indicate that the .skp file was defective.
- At the HackManhattan! Tuesday meeting two nights ago, Dave suggested I ask on the #skeinforge IRC channel what to do. The suggestion was to use cloud.netfabb.com, and it worked. Netfabb also has a free local app you can download and a "pro" version that costs money. But if they do whatever it is they do as well as their Cloud app cleans up .stl files, it sounds really good.
January 13, 2012
I got my used replacement iPod Nano 3G yesterday from Amazon ($60) and replacement earbuds (Etymotic MC5, to replace my ER6i -- also $60). So this evening I went over to the space to put the whole thing together.
The theatre company we share the space with was doing a performance that involved renaissance music and opera singing, and it was very nice to listen to from behind the closed door of HackManhattan!
I brought the following tools with me:
- For filing:
- Mini files
- Nail file
- Sandpaper (several grits)
- For welding:
- Aluminum foil
- Tweezers
Now for the narrative:
- Observation
- My ER6i earbuds had cables that were 1mm in diameter, and the piece was designed to fit that size.
- But the MC5 has a 1.3mm and a 1.7mm cable, so I had to file out the slots more than I would have had I not lost the 6i.
- Still, this points out that for a general design, I should have several slots of varying width
- Filing
- PLA is tough to file. All the filing tools came into play, and it took about an hour.
- I filed two slots to hold the 1.3mm cable and two to snugly hold the 1.7mm cable.
- It took more than an hour.
- More filing was needed to get the pins to fit well:
- I enlarged the holes a bit with a mini round file
- I cleaned the area around the base of the pin with a mini flat file.
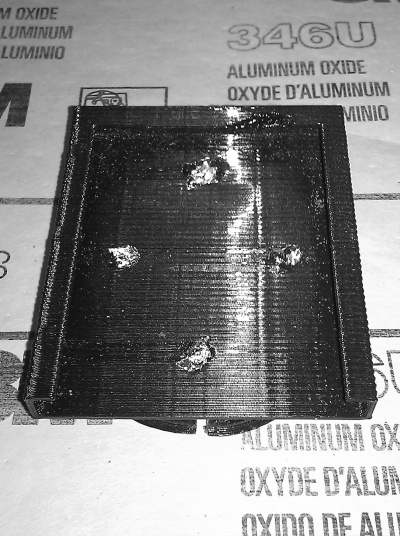
- Welding
- I kept a sliver of aluminum foil between the iron and the plastic.
- The process was very fast.
- Since the pins were on the short side, the motion was to sort of push the edges of the hole into the head of the pin.
Photos
Assembly after welding; note bits of aluminum foil still stuck:
Third Prototype
January 13, 2012
I wore the second prototype home on the subway, and everything worked well. But I can see that a third prototype will be needed.
- The pins should be longer, as Dave (DrReeves) noted earlier. I'll try 2mm.
- Surprisingly, there wasn't enough room on the spool to hold the whole cable comfortably. The spool needs to be higher.
- I should cut more slots, of varying width, to support wires of different thicknesses.
January 24, 2012
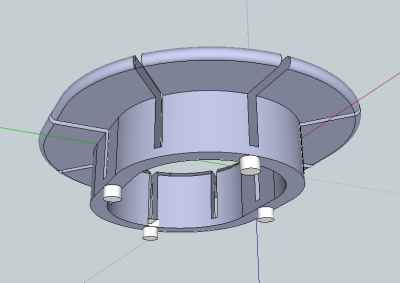
Between the 13th and now I redesigned the spool. The 3rd-gen Sketchup model looks like this:
- I had some difficulty creating an .stl that would work, and that could even be fixed on cloud.netfabb.com.
- I found some flaws in the .skp that were too hard to fix but that are doubtless responsible for the fact that a directly made .stl did not work
- Dave succeeded and printed a copy -- though something of interest occurred along the way:
- The .stl came out 10x too big, even though we both specified "mm" as the unit. The .skp used cm, so this might have to do with how Sketchup handles cm units. When meters ("m") were used, a .stl that specified "mm" worked fine.
- He was able to fix this when creating the tool path.
- My second attempt to create an .stl succeeded (following a netfabb fix), but also came out 10x too big
- At this point, I need to file out the spool and attach it to the holder (still 1st gen!), and Joe will also create an abs print
January 26, 2012
Well, I bought an expensive but beautiful set of little files at Zaks this afternoon, and this evening I assembled the 3rd-gen NanoSpool.
Bottom line is that it works perfectly, and I can't wait to get an ABS print!
Here are the photos. I think it's rather photogenic, don't you?
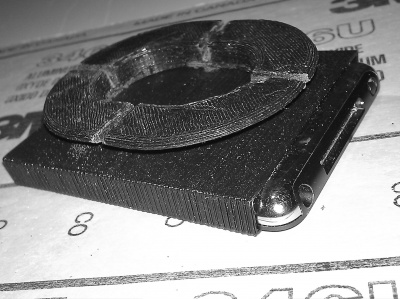
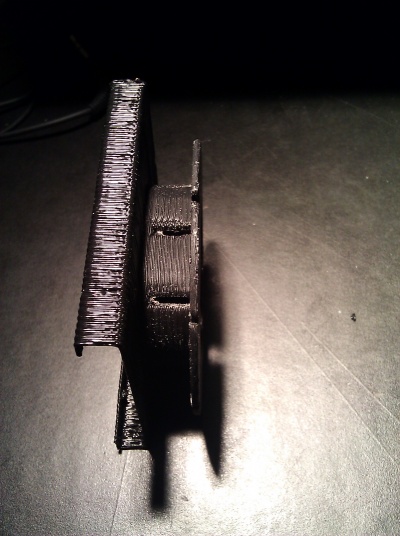
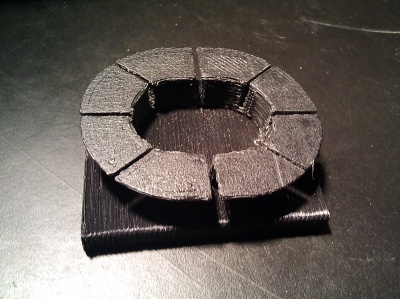
Assembled, viewed from the holder side:
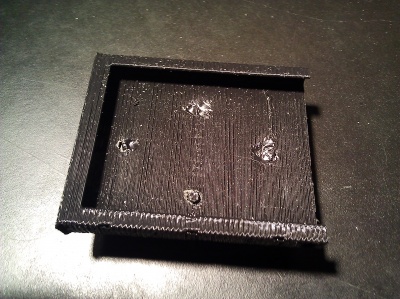
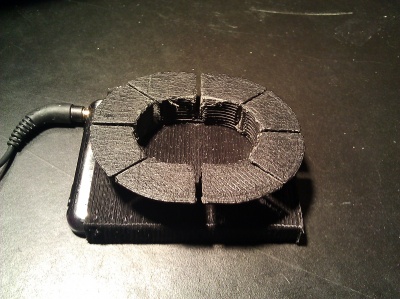
Assembled, viewed from the spool side:
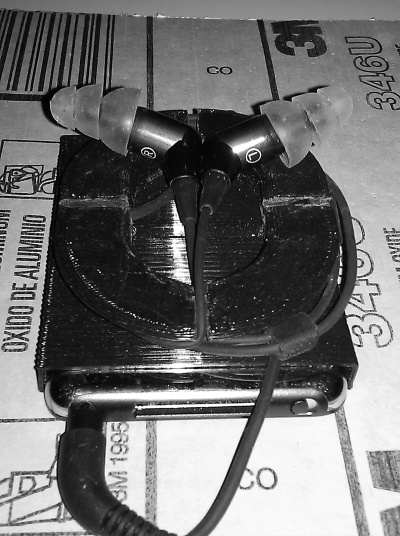
Earbuds fully extended but locked down:
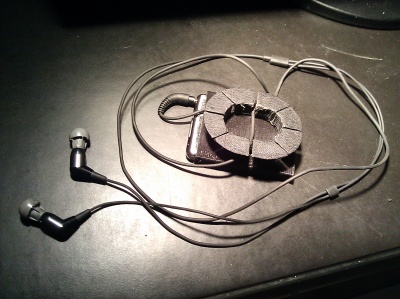
Earbuds extended to 18" for shirt-pocket listening:
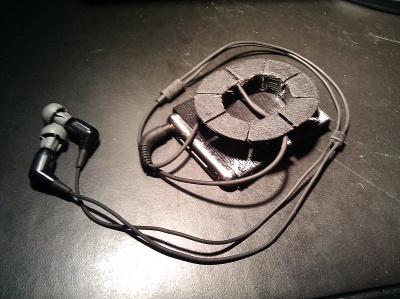
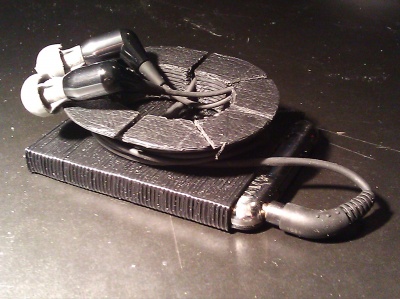
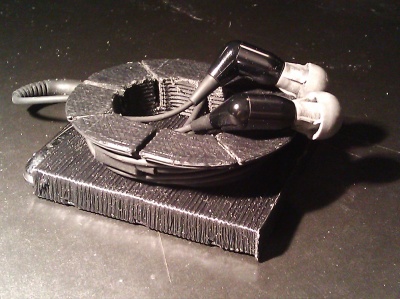
Fully coiled for pocket or purse storage:
It's on Thingiverse now, at http://www.thingiverse.com/thing:16564, so Finito la Musica!
... till the next project, that is.
