Typewriter ASCII art
2014 group project idea. The public facing page is FACETRON6000.
Idea
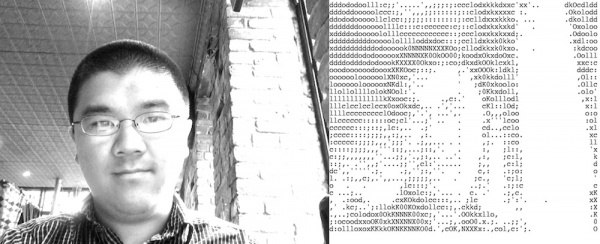
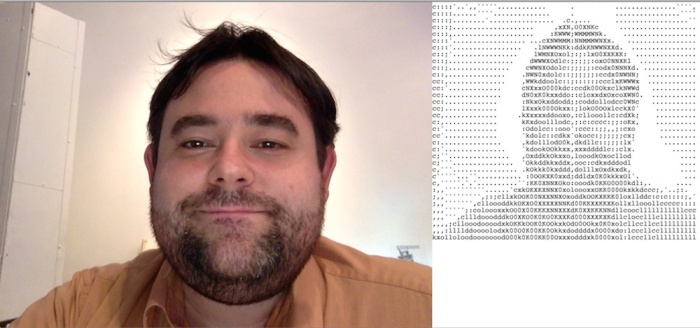
A webcam takes a photo. A typewriter style printer renders it as ASCII art.
Project management
FIGMENT submission
Guan and Meryl. Deadline April 15. FIGMENT is June 7-8, 2014.
Requirements:
- Copy
- Name
MG - I'm thinking the Public Project Description should be written as our marketing pitch. Here's what I drafted so far; needs some polishing, comments welcome:
FACETRON6000 prints your portrait in "ASCII art" on a typewriter. A camera takes your picture, shows you a preview, then lets you press a button and watch your picture "develop" from alphanumerical and symbolic characters. Take home a customized computer-generated photo!
Alternative: Create and take home a genuine/your very own ASCII art self-portrait! FACETRON6000 takes your picture, shows you a preview, then lets you press a button and watch your picture "develop" from alphanumerical and symbolic characters. Be the envy of your friends and family!
Physical realization
Justin
Photo booth? Typewriters scattered across a desk? Help wanted!
- Most likely a single computer/display/webcam, controlling multiple typewriters
- Each typewriter would have an Arduino, connected through a USB hub
- A screen for white background
- Stupidly large button to take the shot?
Image processing and ASCII conversion
Guan
Physical sliders for contrast and such?
Typewriters
Guan and Rob
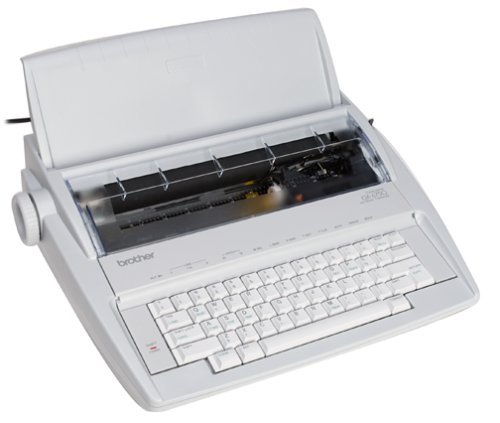
We need more typewriters! Donations welcome. Newer Brother models, especially GX-6750, easier to work with and we can use the same kind of ribbon.
Name
Idea categories:
- Machine/robot: FACETRON6000, TYPETRON6000, Pictobot 2015, BROWNFOX4000
- Descriptive: SelfieType, FaceType, Instypegram, QWERTYmatic, Clackstagram, Snapwriter
- Fun: Mavis Beacon's Photo Booth
- Pun: TArt (for Text Art), PhAArt (for Photo to ASCII Art)
- Name: Barbara, Tracy
Outstanding questions
- Table?
- Will the box have walls, or just one side for a photo background?
Components
Typewriter
- Teletype, teletypewriter, radioteletype
- Daisywheel or ball printer
- Modern typewriter with electronic buffer
- Printing (mainframe) terminals, eg DECwriter
A good option is Brother GX-6750. It's not as easy as using an actual daisy wheel printer. However, it's relatively cheap and available new from Amazon, including ribbon. Once we figure out how to hack it, we can potentially have many of them set up to print at the same time.
See project typewriter for an example of a Brother typewriter based teletype project.
The GX-6750 in the space currently has a breakout board that taps into the ribbon cable. Note that if the keyboard is not flat against the case when the typewriter starts up, it may raise an error. Solve this by pressing down the top two corners of the keyboard 20 seconds after the typewriter powers on.
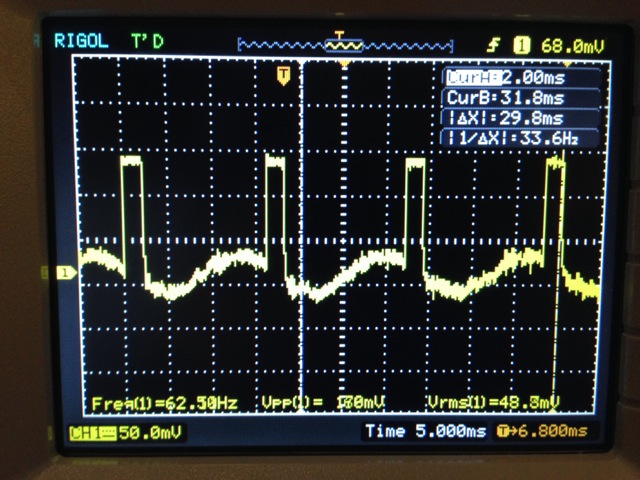
Scan frequency is still 62.5 Hz, with 2 ms per line:
Imaging
A simple webcam should be fine.
We should do some image processing before passing to the ASCII art library. To save keystrokes, we could shoot people against a white background. We could also do edge detection, either directly in Processing or with OpenCV.
This was done in Processing with OpenCV:
ASCII art libraries
- jp2a (C, JPEG only)
- aalib (C)
- Native Java library
For now, we've rolled our own in Java (for Processing). It divides the image into blocks corresponding to each ASCII character, takes the average brightness, then maps linearly into a fixed 22 character set stolen from jp2a.
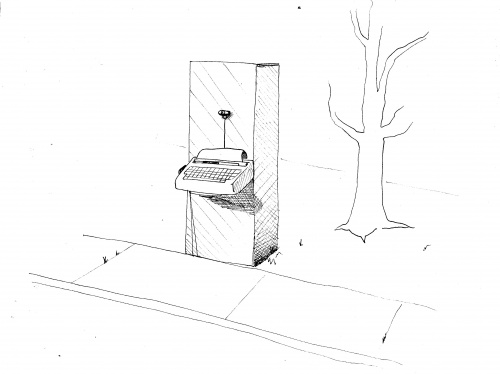
Artists renderings
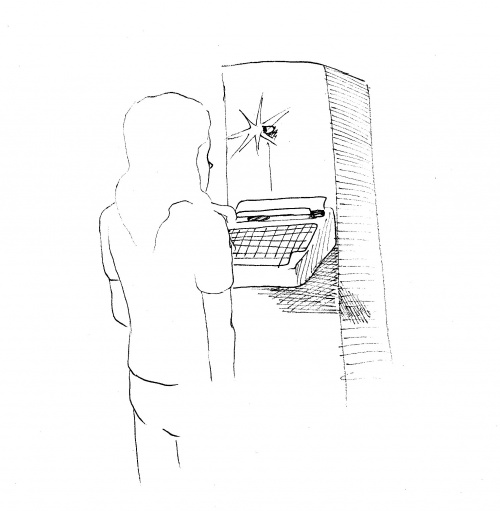
By Diego Zaks
Screenshots
Operator instructions
Basic instructions
Boot into Ubuntu and doubleclick on FACETRON6000 on the desktop. That should launch Processing with our sketch. Click the Play button in Processing's toolbar.
Move the mouse cursor horizontally and vertically to adjust contrast and threshold inside the window. These are the two parameters we adjust to get a good image. The background should be white. Head shape and facial features should be visible.
Press p on the keyboard to print. Make sure you only press once, otherwise bad things can happen.
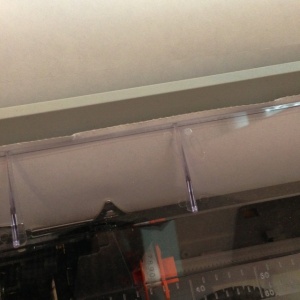
Before starting the print, the top of the paper must be aligned with the TOP of the clear plastic cover:
It is probably a BAD idea to use the paper lock release lever on the typewriter because using it will make it hard to align the angle of the paper. Always keep it locked, and use the return key to advance paper. You can also use the round knob on the left side of the typewriter to advance/reverse paper, or the REV key (CODE-O).
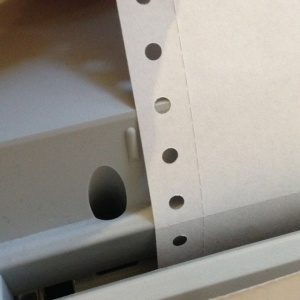
Observe the printing and make sure nothing goes wrong. The paper should probably be further left than you think, to avoid the carriage catching on the paper. The big vertical line in the plastic (not the triangle) is a good approximate position for the left edge of the paper:
To stop printing:
- If it's a mechanical problem, for example paper getting stuck, turn off the typewriter, then hit the Stop button in Processing. Press the Stop button in Processing, unplug and plug the Arduino back in, turn on the typewriter, hit the Start button in Processing.
- If it's not a mechanical problem, for example if you're simply printing the wrong thing but there's nothing fundamentally wrong, hit the Stop button in Processing. Printing will stop after the current line is done. Advance/reverse paper to the appropriate position and start over.
Troubleshooting
Start over
The Arduino MUST be powered on first (connected to a powered on laptop) before you turn on the typewriter.
If you want to power cycle the typewriter, make sure it's off for at least 10 seconds. The caps are very big.
If you power off the Arduino, and turn it back on, it will re-enumerate. You probably need to restart the Processing sketch (Stop button and then Play button).
Make sure the ground is connected if there are weird errors. It will often work without ground connected.
Typewriter connections
If you need to redo the connections from typewriter to Arduino:
The ribbon cable has 16 wires. If you are facing the typewriter, the pin farthest away from you is wire 1. Wires 1-8 are columns and pins 9-16 are wires.
Columns are numbered 0 to 7. Rows are numbered 0 to 7.
Wire 1 is column 0, wire 9 is row 0. Column 0 goes to digital 12, column 1 goes to digital 11, and so forth down to column 7 at digital 5.
Row 0 is digital 4, down to row 2 on digital 2. Then row 3 is on analog 5, down to row 7 on analog 1. Analog 0 on the Arduino is not used.
A thin black wire comes out from under the typewriter keyboard. It is connected to ground on Arduino.
We are using a Seeeduino, a red Arduino clone. It should be in 5V mode.
Linux devices
Near the top, the string variables serialDev and cameraDev specify the serial and camera devices to be used. The serial device is usually /dev/ttyUSB0, but if another Arduino or something else with a virtual serial port is plugged in, it may be different. It seems kind of random which camera device is /dev/video0 and which is /dev/video1. You may have to retry every time.
Image
For threshold, the full width of the window is mapped to a value between 0 and 255. For contrast, the height is mapped to 0 and 5. It may be necessary to alter these ranges. In the case of threshold, it might be to adjust within a smaller range for increased precision. This is done in the following lines:
Imgproc.threshold(mask, mask, (int)Math.round(map(mouseX, 0, width, 0, 255)), 255, Imgproc.THRESH_BINARY);
and
opencv.contrast(map(mouseY, 0, height, 0, 5));
For threshold, the relevant figures are the last two arguments of the map call, not the final 255 or the initial 0. For contrast, it's the last instances of 0 and 5.
Practical
Mic Stand Adapter for Webcam
Download the .SCAD source here .
Stuff to bring
- PVC structure
- staples
- fabric
- Typewriter with electronics
- Dell laptop
- Extra jumper wires (male-male, male-female, female-female)
- Paper ream(s)
- tarp
- USB cable
- Stool
- Butane Iron/Solder
- Spare ribbon
- Power Extension cables/splitter
- HM brochures/cards
- HM banner
- cable ties/twine/duct tape
- Zip ties
- Table
- Folding chairs (do we really need table and chairs?)
Ferries
We have reserved 5 tickets for Saturday and 5 for Sunday for the non-public ferries. They will be picked up by the first people going out on Saturday, at the FIGMENT desk outside the Staten Island (!) Ferry Terminal.
The non-public ferries on Saturday and Sunday depart at 7:00, 7:30, 8:15 and 9:00.
Volunteers
Saturday morning
Meet at Hack Manhattan at 7:30am for 8:15am ferry.
- Guan
- Dave
- Simone
- Justin
- Ron
- Max
Saturday
- Guan
- Simone (till noon-ish)
- Jim arrive 1:30pm ish
Sunday
- Guan
- Meryl
- Peter (willing to help pack up and carry things back -- need to know the time for this)
- Annie (noonish)
Sunday evening to take stuff home
The last public ferry is at 6pm. The non-public ferries are at 6:30pm and 7pm.
