Laserpoint 3 by US Cutter
Laserpoint 3
The Laserpoint 3 by US Cutter
Connecting to the Cutter
There is currently no network interface or server attached to the cutter. Connect your computer to the cutter using a USB-A or USB C to USB-B cable. Take note of which COM port it uses.
Printing with Inkscape
Download Inkscape, or use Inkscape installed on the iMac in the space.
Convert your raster image to a vector
- File -> Import...
- Click ok to import with default settings
- Make sure this new object is selected
- Path -> Trace Bitmap...
- Adjust the settings to your liking
- You can hide or delete the original image in the layers tab
Send to Cutter
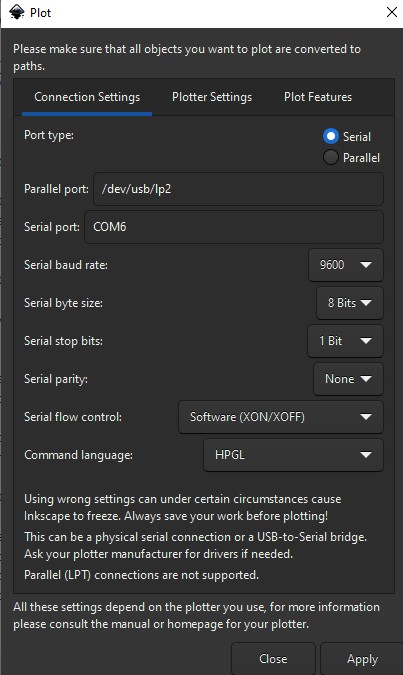
- Extensions-> Export -> Plot...
- Your plot settings should look like this, but with "Serial port" changed to whichever port you're using
- Click "Apply", and the cutter will start
Printing with Inkcut
Download Inkcut
Instructions for Windows, Linux, and Mac
Open a file in Inkcut
- .SVG works well for this
- .SVG files can be formatted with Inkscape
- Example image below
Necessary Settings in Inkcut
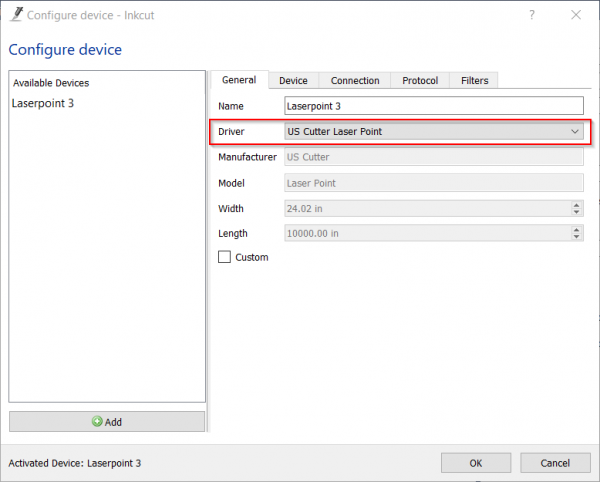
General
Select Driver "US Cutter Laserpoint"
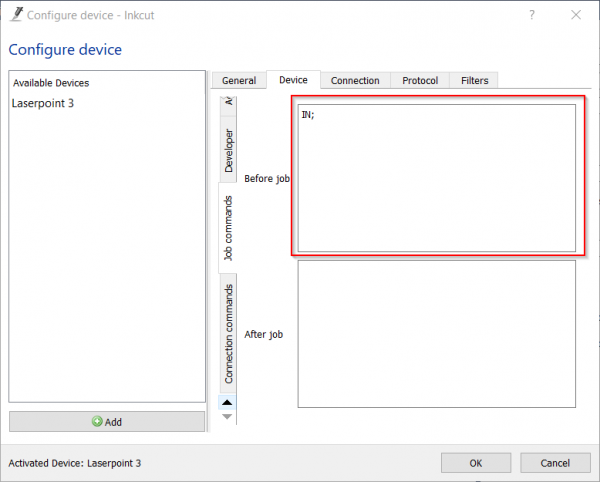
Device
Scroll down in the Device settings column to "Job Commands."
In the section "Before Job," add the following code:
IN;
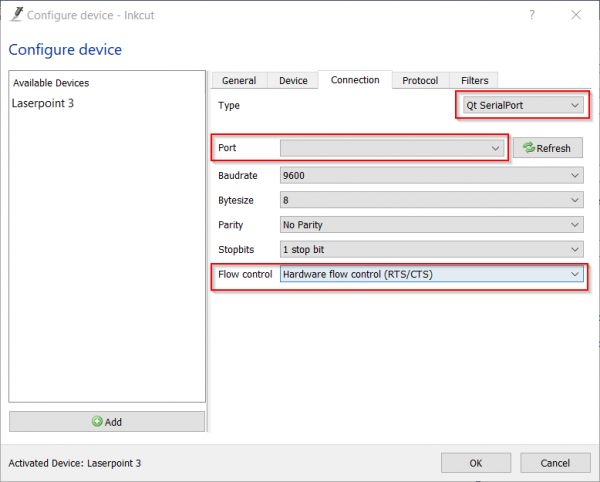
Connection
For Type, select "QT Serialport"
Select the correct port, the USB option that looks most likely to be a vinyl cutter(not shown in screenshot)
Select Hardware flow control (unsure if this setting is 100% necessary).
Then send to print!
(Instructions still in beta testing)
